Professional Termination for 3″ FlexNet Lines.
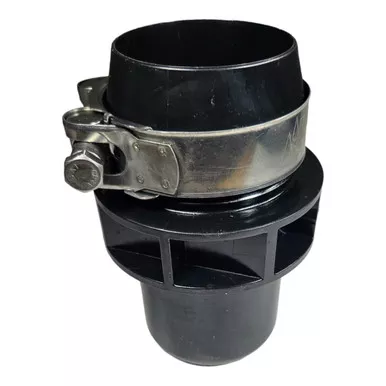
The Netafim FlexNet 3″ End Cap is the industry-standard solution for securely closing off your 3-inch distribution mains. Designed specifically for use with FlexNet Flexible Pipe, this cap ensures a leak-free termination point that can handle the rigorous demands of agricultural irrigation. It is one of the most critical irrigation fittings for growers who need a system that is easy to deploy, retrieve, and store season after season.
Each cap assembly includes a robust metal tightening band (clamp) that locks the fitting onto the pipe, preventing separation under pressure. Whether you are setting up a temporary portable system or a semi-permanent installation, this end cap provides a reliable seal without the need for glues or complex tools.
- Ready to Install: Includes the essential metal band clamp, allowing for immediate and secure installation out of the package.
- High-Performance Material: Constructed from durable polypropylene that resists UV degradation and chemical corrosion from fertilizers.
- Secure Lock: The clamp design ensures the cap stays in place even when the line is fully pressurized, preventing costly blowouts.
- Reusable: Unlike glued PVC caps, this mechanical fitting can be easily removed and reused if you change your field layout.
Verified specifications for system planning.
| Specification | Details |
|---|---|
| Product Type | End Cap / Line Termination |
| Size | 3″ (Fits 3″ FlexNet Pipe) |
| Connection Method | Insert with Metal Band Clamp |
| Material | Polypropylene (Cap) / Metal (Clamp) |
| Included Components | End Cap, Seal, Tightening Band |
| MPN | 05FX03ENDCAP |
| Common Brand Names | Netafim, FlexNet |
Secure the end of your 3″ line in minutes.
Step 1: Position the Clamp
Slide the included metal band clamp over the end of your 3″ FlexNet pipe. Make sure it slides freely beyond the insertion depth.
Step 2: Insert the Cap
Push the 3″ end cap fully into the open end of the FlexNet pipe. Ensure the pipe end is cut square for the best fit.
Step 3: Secure the Connection
Slide the metal clamp back over the pipe where the cap is inserted. Tighten the clamp firmly using a nut driver or appropriate tool to create a watertight seal.