Precision Watering With Take-Apart Cleaning
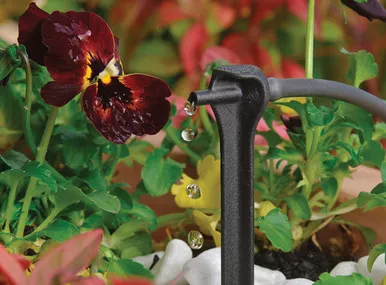
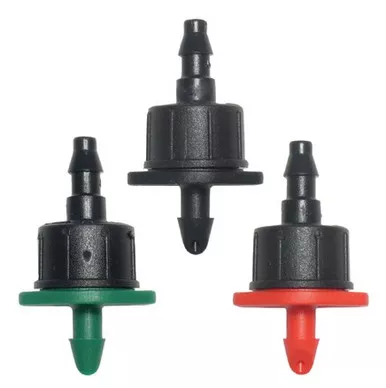
The CETA PC Emitter combines the pinpoint accuracy of a pressure-compensating dripper with the ultimate convenience of a removable cap. Designed to deliver a consistent, uniform flow rate across sloped terrain and long runs of 1/2″ mainline tubing, these emitters ensure every plant gets exactly the right amount of water. Available in three different flow rates, they are ideal for diverse landscapes, containers, and elevated garden beds.
What truly sets the CETA PC Emitter apart is its maintenance-friendly design. While standard emitters must be thrown away if they clog, the CETA features a twist-off top that allows you to quickly clean the internal diaphragm and restore perfect flow. Built with UV and chemical-resistant materials and featuring an anti-insect baffle, this is a durable, long-term solution for professional and residential irrigation systems alike.
- Pressure Compensating (PC): Guarantees a consistent water output across varying pressures (15 to 45 PSI), making it perfect for uneven landscapes and long tubing lines.
- Take-Apart Design: The cap easily unscrews to expose the internal diaphragm, allowing you to flush out sediment or debris and reuse the emitter.
- Anti-Insect Baffle: Engineered to deter spiders and insects from entering the emitter outlet and causing blockages.
- Versatile Connections: Features 1/4″ barbs on both the inlet and outlet, allowing for direct-to-mainline or micro-tubing extensions.
- Durable Construction: Manufactured from high-quality, UV and chemical-resistant plastics for a long lifespan in harsh outdoor conditions.
Detailed specifications for system planning.
| Specification | Details |
|---|---|
| Product Type | Pressure Compensating (PC) Drip Emitter |
| Inlet Connection | 1/4″ Barb (Colored Side) |
| Outlet Connection | 1/4″ Barb |
| Operating Pressure | 15 to 45 PSI |
| Maintenance | Twist-off cap for easy cleaning |
| Material | UV and Chemical Resistant Plastic |
A quick guide to installing and maintaining your CETA emitters.
Step 1: Punch the Hole
Using a standard irrigation hole punch, create a hole directly into your 1/2″ or 3/4″ mainline tubing.
Step 2: Insert the Emitter
Locate the colored side of the CETA PC Emitter (this is the water inlet). Push the colored barb firmly into the punched hole until it snaps securely into place.
Step 3: Attach Micro Tubing (Optional)
If your plant is further away from the mainline, push a piece of 1/4″ micro tubing onto the top outlet barb to extend the water directly to the plant’s root zone.
Step 4: Cleaning and Maintenance
If the emitter becomes clogged, gently twist and pull the top cap off to expose the internal diaphragm. Rinse the components with water to clear any sediment, then snap the cap back on.