Commercial-Grade Durability in a 1-Inch Profile
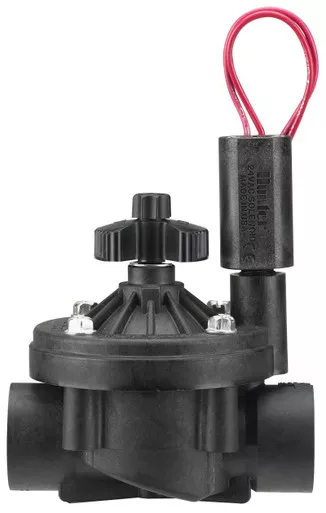
The Hunter ICV 1″ AC Valve with Flow Control brings true commercial-grade power to standard 1-inch irrigation manifolds. Engineered from high-strength, glass-filled nylon rather than standard PVC, this valve is designed to withstand punishing pressure spikes up to 220 PSI that would easily shatter standard residential equipment.
Inside, the ICV utilizes a rugged, fabric-reinforced EPDM diaphragm and seat. This specialized internal construction ensures flawless performance and resists wear and tear even when processing dirty, sandy, or reclaimed water. When wired to a standard AC Irrigation Controller, the built-in flow control handle allows you to precisely dial down pressure and output, making it an incredibly versatile, fail-safe choice for demanding landscape and agricultural zones.
- Glass-Filled Nylon Body: Delivers an exceptionally high-pressure rating (up to 220 PSI), effectively resisting stress failures and water hammer.
- EPDM Diaphragm & Seat: The fabric-reinforced internal components resist degradation, ensuring reliable activation in harsh or reclaimed water systems.
- Precise Flow Control: Maximize system efficiency by manually dialing down water volume to perfectly balance the output for specific zones.
- Manual Bleed Options: Features both internal and external manual bleed mechanisms for fast, easy in-field testing and maintenance.
Detailed specifications for system planning.
| Specification | Details |
|---|---|
| Operating Flow Range | 0.1 to 40 Gallons Per Minute (GPM) |
| Operating Pressure Range | 20 to 220 PSI |
| Inlet / Outlet Size | 1″ Female Pipe Thread (FPT) |
| Solenoid Power | 24 VAC (Standard hardwired controllers) |
| Valve Configuration | Globe Valve |
| Max Temperature Rating | 150° F |
Follow these steps to safely plumb and wire your Hunter ICV valve.
Step 1: Plumb the Connections
Using high-quality Teflon tape, thread 1″ male PVC adapters into the inlet and outlet ports. Ensure the directional arrows on the valve body perfectly align with the direction of your water flow.
Step 2: Install in a Valve Box
Seat the fully plumbed valve inside an underground rectangular valve box over a deep bed of gravel to ensure proper drainage and protection from freezing.
Step 3: Connect the Wiring
Connect one wire from the 24V solenoid to your controller’s common wire, and the other solenoid wire to the specific station/zone wire. Securely seal all connections using waterproof wire nuts.
Step 4: Adjust the Flow
Turn on your main water source and activate the zone manually. Rotate the top flow control handle to dial in the perfect operating pressure and volume for your downstream emitters.