Commercial-Grade Precision Watering by Netafim
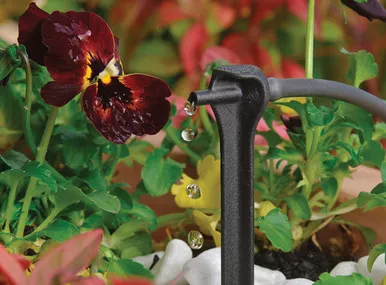
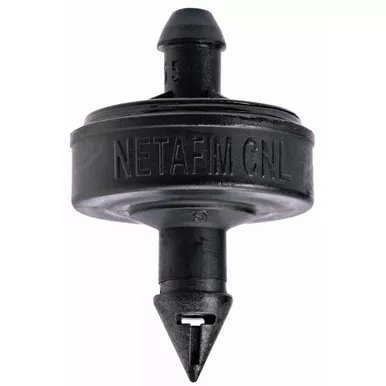
The Netafim Self-Piercing 1.0 GPH Drip Emitter (Black) brings professional-level irrigation control directly to your home garden, planter boxes, hanging baskets, and landscape shrubs. Utilizing advanced pressure-compensating technology, these emitters guarantee a highly accurate and consistent output of exactly 1.0 gallon per hour across a wide operating pressure range (10.15 to 58 PSI).
Designed for unparalleled ease of use, these emitters feature a rugged, self-piercing inlet barb. This allows you to press the emitter firmly into your 1/2″ Mainline Tubing without requiring a separate hole punch tool. Once installed on the mainline, simply attach 1/4″ micro-tubing to the top outlet barb to deliver targeted, reliable hydration right to your plant’s root zone, whether installed on the surface or buried underground.
- Self-Piercing Barb: The reinforced 0.160″ inlet barb easily punctures polyethylene mainline tubing, significantly speeding up installation.
- Pressure Compensating: Ensures every single plant on the line receives exactly 1.0 GPH, regardless of elevation changes or fluctuating system pressures.
- Subsurface Ready: The commercial-grade design allows these emitters to be buried safely near root zones without clogging from dirt or root intrusion.
- Color-Coded Output: The distinct black color instantly identifies this as a standard 1.0 GPH emitter, making system maintenance visually simple.
Detailed specifications for system planning.
| Specification | Details |
|---|---|
| Flow Rate | 1.0 Gallon Per Hour (GPH) |
| Color Code | Black |
| Operating Pressure | 10.15 to 58 PSI (Pressure Compensating) |
| Inlet Size | 0.160″ – 0.170″ Self-Piercing Barb |
| Outlet Size | 0.160″ Barb (Fits 0.160″ ID x 0.220″ OD micro-tubing) |
| Filtration Requirement | 120 Mesh Minimum |
| Installation Types | Surface or Subsurface |
Follow these easy steps to install your Netafim self-piercing emitters.
Step 1: Pierce the Mainline
Take the pointed base inlet barb of the black emitter and press it firmly and directly into the wall of your 1/2″ or 3/4″ polyethylene mainline tubing until it pops securely into place.
Step 2: Attach the Micro-Tubing
Push one end of your 1/4″ micro-tubing onto the exposed top outlet barb of the emitter.
Step 3: Route to the Plant
Run the micro-tubing directly to the base of your plant, shrub, or into your hanging basket. Secure the end of the tubing near the root zone with a wire hold-down stake.