Low-Profile Watering for High-Traffic Gardens
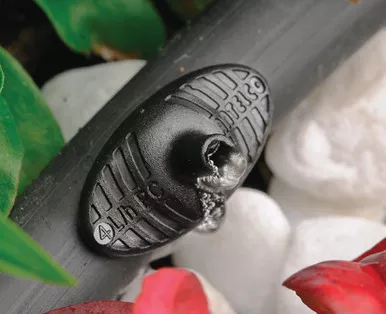
The Pinch Drip Emitter provides reliable, point-source watering with a unique low-profile design. Engineered to lay completely flat against your 1/2″ mainline tubing, these emitters resist getting snagged, knocked off, or damaged by garden tools and foot traffic. Featuring a simple finger-and-thumb installation process, they are perfect for quick setups in container gardens, patio pots, and crowded landscape beds.
Despite their small size, Pinch Drip Emitters are packed with professional-grade features. A built-in inlet filter and a self-flushing turbulent flow path work together to minimize blockages, while an integrated insect baffle prevents pests from nesting in the outlet. Built with UV-stabilized materials, they ensure long-lasting performance season after season.
- Low-Profile Design: Lays flat against the tubing, dramatically reducing the risk of accidental damage from rakes, hoses, or pets.
- Self-Flushing Action: Features a turbulent flow path that continually clears small debris during operation to prevent clogging.
- Dual Protection: Equipped with a built-in inlet barb filter to catch sediment, plus an insect baffle on the outlet.
- Easy Installation: Designed specifically for tool-free “finger or thumb” insertion once your tubing hole is punched.
- Durable Construction: Long-life UV-stabilized plastics resist degradation from harsh, direct sunlight.
Detailed specifications for system planning.
| Specification | Details |
|---|---|
| Product Type | Point-Source Drip Emitter |
| Inlet Connection | 1/4″ Barb (Colored Side) |
| Outlet Connection | 1/4″ Nipple (Black Side) |
| Operating Pressure Range | 15 to 45 PSI |
| Flow Type | Turbulent Flow (Self-Flushing) |
| UV Stabilized | Yes |
Installing the Pinch Drip Emitter is quick and requires no special insertion tools.
Step 1: Punch the Hole
Using a standard irrigation hole punch (like the Key Punch or Pocket Punch), create a hole directly into your 1/2″ or 3/4″ mainline tubing where you want to place the emitter.
Step 2: Identify the Inlet
Locate the colored side of the Pinch Drip Emitter. This colored barb contains the built-in filter and is the water inlet that goes into the tubing.
Step 3: Insert the Emitter
Squeeze the emitter firmly between your thumb and forefinger. Push the colored barb into the punched hole until you hear or feel a “snap,” confirming it is locked in place.
Step 4: Attach Micro Tubing (Optional)
If your plant is further away from the mainline run, you can push a piece of 1/4″ micro tubing onto the black outlet nipple to deliver water precisely to the plant’s root zone.